The Why and How of My Unitank
When retooling my home brewery last year, I decided to go all-out and buy a unitank. This post outlines why that’s overkill and why I’m glad I did it.
One of the biggest differences between commercial and homebrew operations involves the practicalities of different fermentation vessels. Homebrewers working with five or ten gallon batches ferment in vessels that you won’t typically use in a commercial brewery, including:
- food-grade plastic buckets,
- glass carboys,
- modified kegs, and
- stainless steel buckets.
The continued popularity of these rests at the intersection of tradition and affordability; I brewed for over fifteen years using a combination of plastic buckets and glass carboys. However, their suitability for fermenting five-gallon batches largely rests on the theoretical possibility of moving them around. This might happen when moving them to a temperature-controlled environment (basement, fermentation fridge, Bohemian cavern); for gravity transfers during packaging; and for cleaning.
However, once you surpass your ability and/or willingness to pick up a slippery, glass jar containing 60+ pounds of precious liquid, you have to consider alternatives to moving a fermentation vessel full of liquids. This results in a number of immediate consequences:
- how to cool the fermenting beer if you can’t move the container?
- how to transfer wort into fermenter and beer out of it if you can’t rely (entirely) on gravity?
- how to clean a vessel that you can’t pick up and put in the sink?
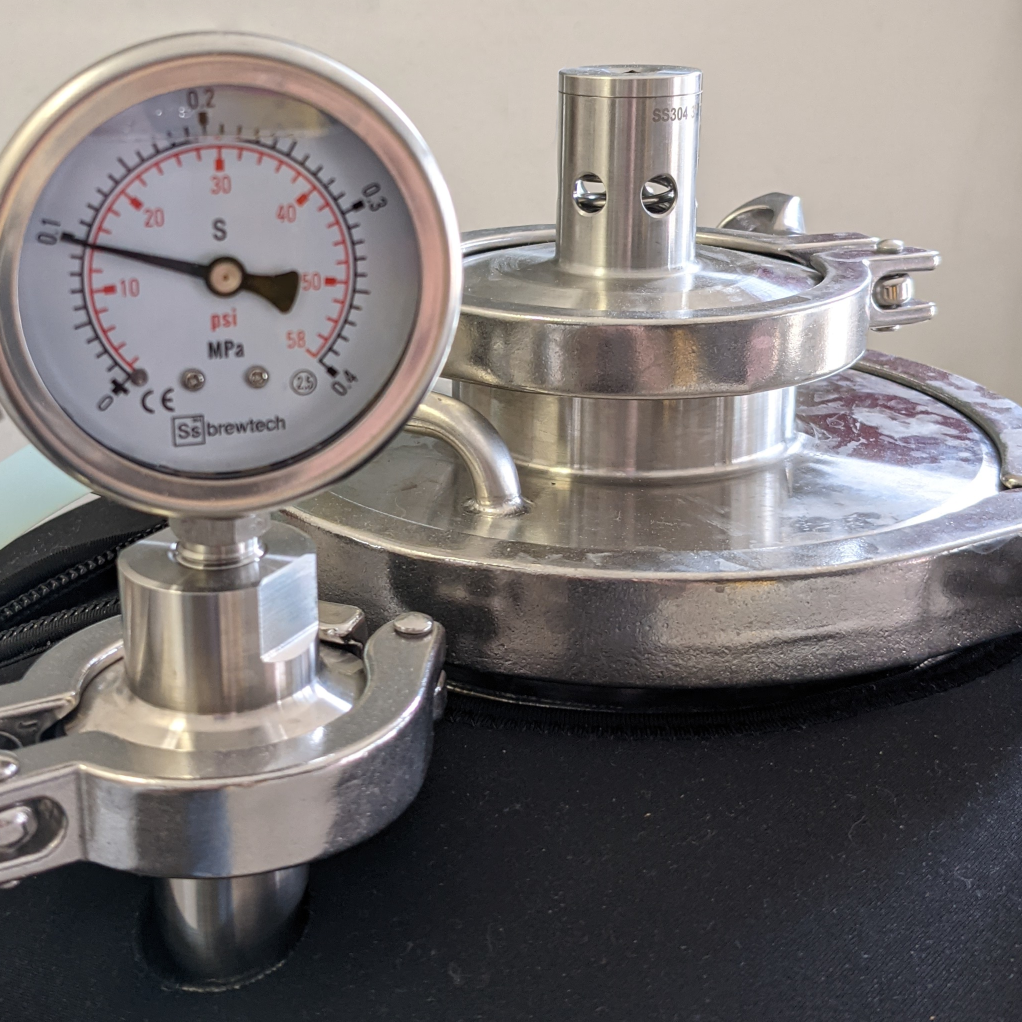
These are just some of the issues of large-scale brewing that result in the standard utilization of stainless steel conical fermenters. A commercially-brewed beer might pass through multiple containers on its way to your glass: a conical fermenter for fermentation, followed by a brite tank for conditioning and dispensing (direct draw to taps or packing into kegs or cans). Alternatively, a brewery may use a unitank. This refers to a single (“uni”) tank that serves the functions of both the fermenter and the brite tank. Features of a unitank often include:
- bottom port for dumping trub and harvesting yeast;
- racking port for sediment-free transfer;
- sanitary ports for sampling;
- support for clean-in-place (CIP) cleaning/sanitization;
- support for pressurized transfer;
- support for pressurized fermentation; and
- carbonation stone for oxygenation and/or carbonation.
It should be noted that most of these address the practicalities of fermenting, packaging, and dispensing large batches of beer. Very few of these are required for making award-winning beer, and homebrewers have (and will continue) to make beer of the highest quality using plastic buckets and glass carboys.
When I set out to upgrade my brewing system from 5 gallon to 10 gallon batches, I owned a single 5-gallon carboy and a broken fermentation chest freezer. My immediate problems were to expand my fermentor capacity and find a way to manage fermentation temperatures. After going back and forth for a number of months, I decided that I would go forgo a fermentation chamber in favor of cooling coils and a glycol chiller. This is the setup I was accustomed to at the brewery, and it provided a number of benefits in my garage brewery as well. For example, I don’t have to worry about knock-out; I can rapidly chill wort to pitching temps in the fermentor.
This still left a number of options. Even considering a single manufacturer, SS BrewTech, glycol-compatible fermentors include stainless steel buckets, conical fermentors, and unitanks. The idea of keeping things simple and going with stainless steel buckets was very appealing. On the other hand, some of the features of unitanks were very appealing to me. And while I was building my brewery for the second time, the idea of getting a fermentor that would grow with me was more appealing than the thought of replacing one a few years down the line.
My thinking then was that while I might not immediately use all of the features of that a unitank brings, I would go ahead and buy one. That way if I wanted to experiment at some point in the future with, e.g., direct draw or pressure fermentation, I would have a vessel suitable to the task.
In fact, I underestimated the convenience of my unitank to my brewing process. I ended up using almost all of the capabilities of my unitank in my first brew, including:
- CIP (note, sanitizing in advance makes for a shorter brew day);
- faster transfer and finishing knockout using the cooling coils;
- easy hydrometer readings through the sampling port (though I mostly rely on my Tilt hydrometer for tracking progress);
- pressure fermentation;
- crash cooling and dumping trub;
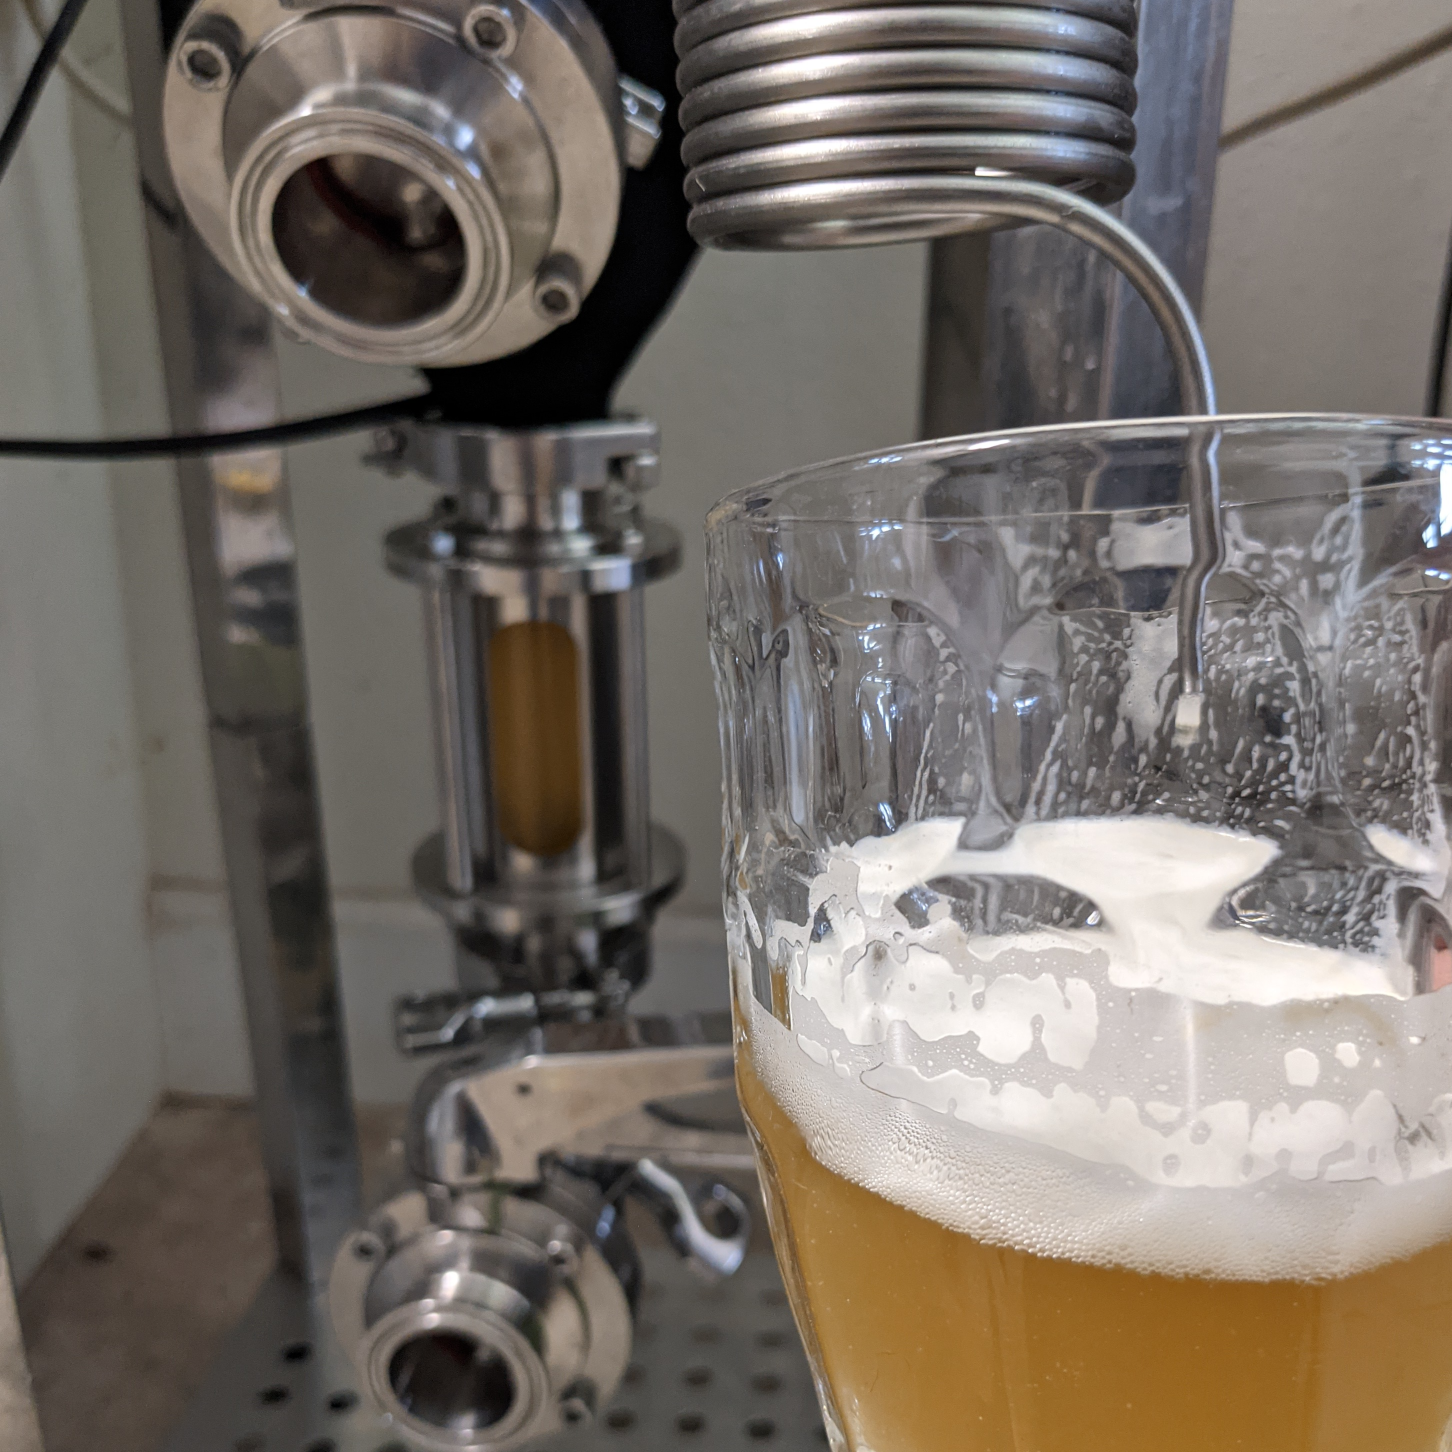
- dispensing from the unitank; and
- closed transfer under pressure of carbonated beer into kegs.
My two favorite features, the ability to ferment under pressure for natural carbonation and the ability to serve from the unitank, both rely on the higher working pressure of the unitank (relative to a standard conical fermentor). This means that not only do I save money on CO2 (and trips to my gas supplier, a 90-minute round trip), but I also have carbonated beer faster. Furthermore, after fermentation is done, I can crash the beer, dump the yeast, and serve from the tank until such point in time as it’s convenient for me to keg the beer. Hypothetically, I could consume the entire batch from the tank, although that would waste a bit as the sampling port pulls from a higher point than the racking arm.
I’ll describe the process from my most recent beer, a Czech Pale Lager. I sanitized the fermenter using the CIP ball on Saturday in advance of brewing. I brewed on Sunday evening, knocking the wort out to about 80°F using my plate chiller (groundwater temps here are already high). I let the cooling coils take it down to the pitching temp of 50°F, which did take a few hours because I neglected to lower the temp on the glycol chiller in advanced. I oxygenated through the carb stone, then pitched the yeast. I watched the gravity drop over the subsequent days and then, around halfway, I set the spunding valve to 15 psi and allowed the temperature to free-rise to 60°F. A few more days and the beer had achieved final gravity. I let it sit for a day longer, checked the sample for off-flavors, then dumped the yeast. I crashed to 40°F, dumped the remaining yeast, then put CO2 on the carb stone at the appropriate pressure. A few hours later I was drinking the beer from the unitank, ten days after brewing it!
What’s even better for me is that I have the flexibility to dispense from the unitank until I’m ready to keg the beer. As of this post, it’s been a week and I’m still pouring pints and filling growlers from the tank. Even kegging is more convenient now; I put 15 psi in both the (sanitized and chilled) keg and the unitank, hook a balance line from the keg’s gas post to the tank’s blow-off cane, and then gravity feed (under pressure) the carbonated beer into the kegs. I have the ability to pour of pint of beer from the first keg in the kegerator while the second keg is still filling from the unitank.
I won’t lie to you: the unitank is a sexy piece of equipment, and I do enoy geeking out on the more advanced features. But ultimately, the convenience is the main benefit for me: the ability to enjoy the beer on my schedule.